# 前置操作
调用 365开放平台MCP server前,需要完成一些前置操作
1、创建开放平台应用,获取应用ak/sk,后续能力调用需要使用。应用创建方式详见: [创建企业自建应用](/app-integration-dev/guide/self-app/create-app.html)
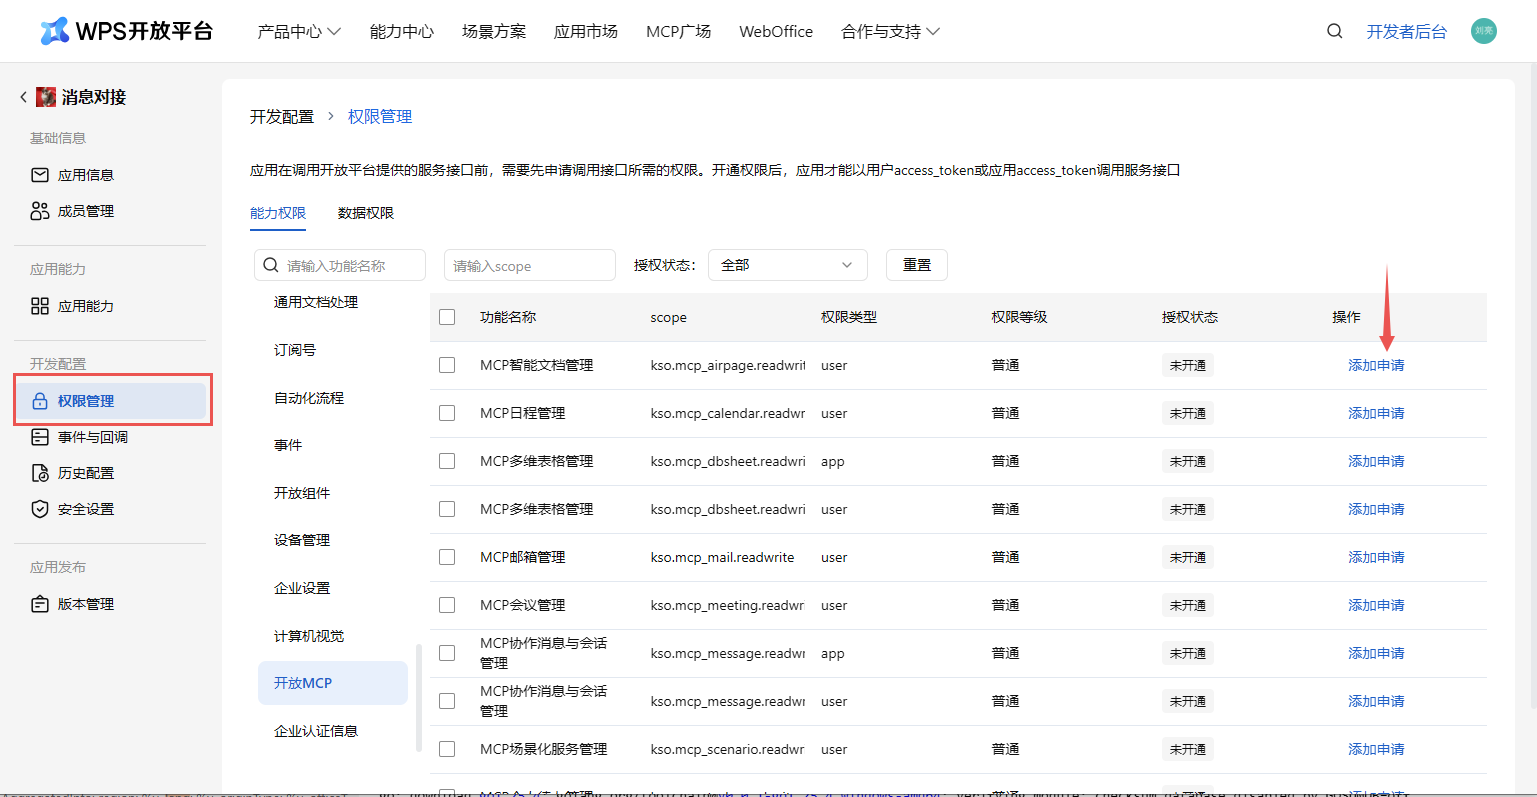
2、在应用详情的 **权限管理** 菜单,完成对相关应用能力权限的申请:
> MCP 能力对权限的依赖,详见工具列表
3、申请用户访问凭证,详见 [用户授权流程](/app-integration-dev/wps365/server/certification-authorization/user-authorization/flow.html)、[获取用户access_token](/app-integration-dev/wps365/server/certification-authorization/get-token/get-user-access-token.html)
4、访问前请确认关闭接口签名(暂不支持接口签名)

# 对接流程
前置操作完成,可以进行MCP server调用。MCP 2.0 已发布,主要在授权范围、服务URL 与工具名称等方面做了升级;对 MCP 1.0 的调用保持完全兼容,现有集成无需改动即可继续使用,也可按需切换到 MCP 2.0 的调用方式。
## 客户端配置
### Cursor
#### 新增MCP服务
在Cursor中使用 `Ctrl+Shift+P` 打开命令列表
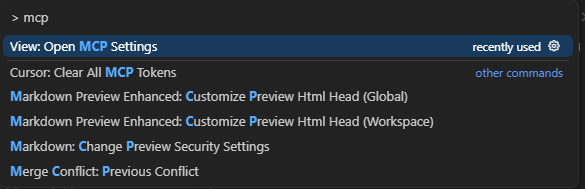
点击 `View: Open MCP Settings` 打开设置面板
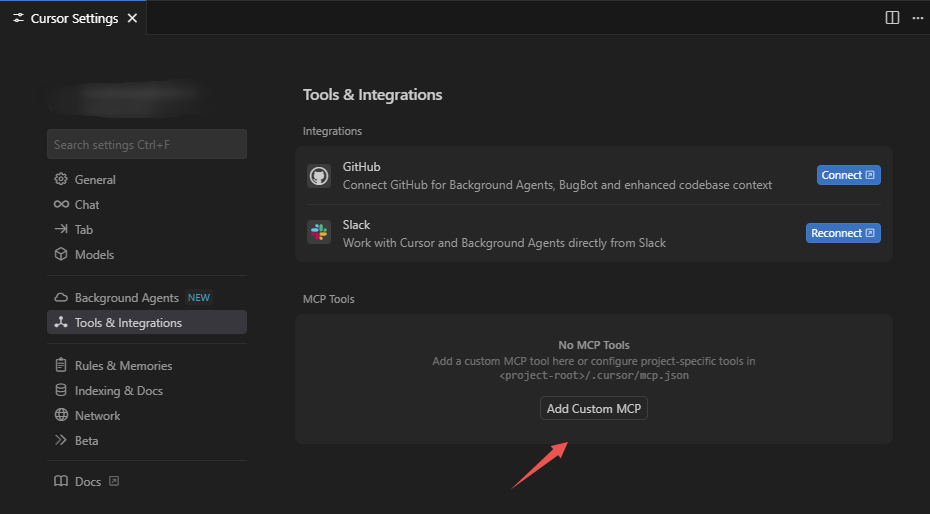
选择 `Add Custom MCP` 创建自定义MCP配置,Cursor会在用户目录下创建MCP配置文件 `~/.cursor/mcp.json`。
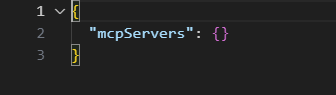
以日历工具为例,在文件中添加一个 `wps_calendar` mcp服务配置,在url中添加端点路径和在headers添加鉴权令牌。
> 浏览已支持的mcp server和查看mcp server 端点 url 可以在工具列表查看
在实际配置中,需要将 `{access_token}` 替换为自己申请的令牌 [如何申请鉴权令牌](/app-integration-dev/wps365/server/certification-authorization/get-token/get-user-access-token.html)
```json
{
"mcpServers": {
"wps_calendar": {
"url": "https://openapi.wps.cn/mcp/v2/kso-calendar/message",
"headers": {
"Authorization": "Bearer {access_token}"
}
}
}
}
```
添加成功后回到Cursor配置界面,出现 `wps_calendar` 并能展示获取的工具列表后说明MCP已添加成功。
配置完成后即可在Cursor Chat里进行调用
#### 日程工具调用示例
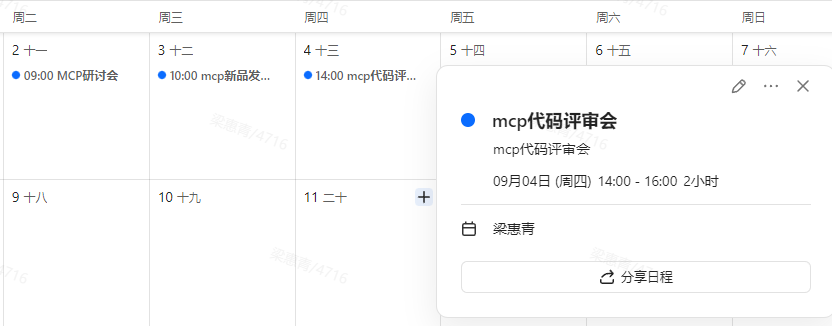
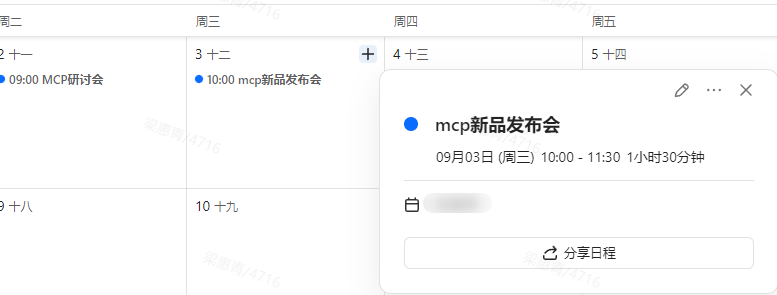
如下图所示,用户已有在2025/09/02 ~ 2025/09/04之间已有一个日程
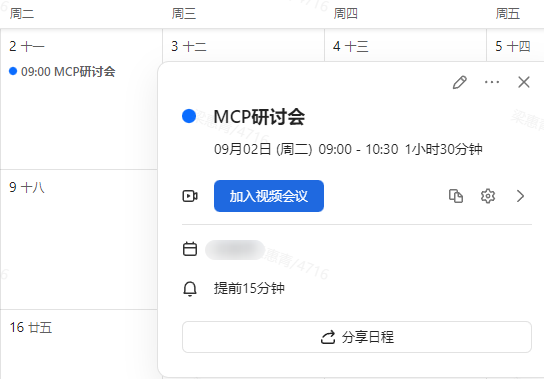
接下来将通过调用工具来获取日程信息并新建一个日程
调用成功后,在协作日历中查看日程(对应申请令牌用户的日历),如下图所示即为调用成功。
更多Cursor配置能力请参考 [Cursor官方配置指南](https://docs.cursor.com/en/context/mcp)
## 代码调用(python示例)
### 环境搭建
#### 安装python环境管理工具uv
MacOS/Linux
```bash
curl -LsSf https://astral.sh/uv/install.sh | sh
```
Windows
```powershell
powershell -ExecutionPolicy ByPass -c "irm https://astral.sh/uv/install.ps1 | iex"
```
#### 初始化项目
MacOS/Linux
```bash
# 创建项目
uv init mcp-client
cd mcp-client
# 创建并激活虚拟环境
uv venv
source .venv/bin/activate
# 安装依赖
uv add "mcp[cli]" httpx
# 创建客户端实现文件
touch client.py
```
Windows
```powershell
# 创建项目
uv init mcp-client
cd mcp-client
# 创建并激活虚拟环境
uv venv
.venv\Scripts\activate
# 安装依赖
uv add mcp[cli] httpx
# 创建客户端实现文件
new-item client.py
```
#### 构建StreamableHTTP客户端
由于MCP Server是根据wps开放接口封装生成,访问开放接口所需的凭证在访问MCP Server时一样需要。目前开放平台采取的方案是通过http header透传Authorization信息。构建MCP HTTP Client时可参考下列代码传递凭证,HTTP方式可用日历MCP服务试用:**https://openapi.wps.cn/mcp/v2/kso-calendar/message**
> 更多MCP可在工具列表查看
```python
async with streamablehttp_client(url: "https://openapi.wps.cn/mcp/v2/kso-calendar/message", headers={
"Authorization": f"Bearer " + access_token
}) as (
read_stream,
write_stream,
_,
):
async with ClientSession(read_stream, write_stream) as session:
result = await session.initialize()
assert isinstance(result, InitializeResult)
assert result.serverInfo.name == "StatelessServer"
tool_result = await session.call_tool("echo", {"message": "hello"})
assert len(tool_result.content) == 1
assert isinstance(tool_result.content[0], TextContent)
assert tool_result.content[0].text == "Echo: hello"
for i in range(3):
tool_result = await session.call_tool("echo", {"message": f"test_{i}"})
assert len(tool_result.content) == 1
assert isinstance(tool_result.content[0], TextContent)
assert tool_result.content[0].text == f"Echo: test_{i}"
```
以下是一个使用MCP Client 访问MCP HTTP Server的代码示例。
```python
# client.py
import asyncio
import json
import os
from typing import Optional
from contextlib import AsyncExitStack
from mcp import ClientSession
from mcp.client.streamable_http import streamablehttp_client
from mcp.types import InitializeResult, TextContent
from openai import AsyncOpenAI
from dotenv import load_dotenv
load_dotenv() # load environment variables from .env
async def streamable_http_tools(method, **kwargs):
async with streamablehttp_client(url=sys.argv[1], headers={
"Authorization": f"Bearer {sys.argv[2]}"
}) as (
read_stream,
write_stream,
_,
):
async with ClientSession(read_stream, write_stream) as session:
if method == "initialize":
return await session.initialize()
elif method == "list":
return await session.list_tools()
elif method == "call":
result = await session.call_tool(**kwargs)
return result
class MCPClient:
def __init__(self):
self.openai = AsyncOpenAI(api_key=os.getenv("OPENAI_API_KEY"), base_url=os.getenv("OPENAI_BASE_URL"))
async def connect_to_http_server(self, server_url: str, access_token: str):
"""Connect to an MCP server running with HTTP transport"""
await streamable_http_tools("initialize")
async def process_query(self, query: str) -> str:
"""Process a query using OpenAI API and available tools"""
messages = [
{
"role": "user",
"content": query
}
]
response = await streamable_http_tools("list")
available_tools = [{
"type": "function",
"function": {
"name": tool.name,
"description": tool.description,
"parameters": tool.inputSchema
}
} for tool in response.tools]
print("Available tools: ", [tool["function"]["name"] for tool in available_tools])
# Initial OpenAI API call
completion = await self.openai.chat.completions.create(
model=os.getenv("OPENAI_MODEL"),
max_tokens=1000,
messages=messages,
tools=available_tools
)
# Process response and handle tool calls - support multiple rounds
max_iterations = 10 # Prevent infinite loops
iteration = 0
while iteration < max_iterations:
assistant_message = completion.choices[0].message
if assistant_message.tool_calls:
print(f"\n--- Round {iteration + 1}: AI wants to call {len(assistant_message.tool_calls)} tool(s) ---")
# Add assistant message with tool calls to conversation
messages.append({
"role": "assistant",
"content": assistant_message.content,
"tool_calls": assistant_message.tool_calls
})
# Execute all tool calls in this round
for tool_call in assistant_message.tool_calls:
tool_name = tool_call.function.name
tool_args = json.loads(tool_call.function.arguments)
print(f"Calling tool: {tool_name} with args: {tool_args}")
result = await streamable_http_tools("call", name=tool_name, arguments=tool_args)
# Add tool result to conversation
messages.append({
"role": "tool",
"tool_call_id": tool_call.id,
"content": result.content[0].text
})
# Get next response from OpenAI after all tools in this round
completion = await self.openai.chat.completions.create(
model=os.getenv("OPENAI_MODEL"),
max_tokens=1000,
messages=messages,
tools=available_tools
)
iteration += 1
else:
# No more tool calls, we have the final response
break
# Get the final response content
final_response = completion.choices[0].message.content
if iteration >= max_iterations:
return f"Reached maximum iterations ({max_iterations}). Last response: {final_response or 'No final response'}"
if isinstance(final_response, (dict, list)):
return str(final_response)
else:
return final_response or "No response generated"
async def chat_loop(self):
"""Run an interactive chat loop"""
print("\nMCP Client Started!")
print("Type your queries or 'quit' to exit.")
while True:
try:
query = input("\nQuery: ").strip()
if query.lower() == 'quit':
break
response = await self.process_query(query)
print("\n" + response)
except Exception as e:
print(f"\nError: {str(e)}")
async def main():
if len(sys.argv) < 3:
print("Usage: python client.py ")
sys.exit(1)
client = MCPClient()
try:
await client.connect_to_http_server(server_url=sys.argv[1], access_token=sys.argv[2])
await client.chat_loop()
except KeyboardInterrupt:
print("\nClient is closing...")
except Exception as e:
print(f"Error: {e}")
finally:
print("Client is closed.")
if __name__ == "__main__":
import sys
asyncio.run(main())
```
### 配置运行
在client.py同级目录下创建配置文件.env,填写选用的llm模型配置,文件示例
```ini
# OpenAI 兼容API配置
OPENAI_API_KEY=your-llm-key
OPENAI_BASE_URL=your-llm-base-url
OPENAI_MODEL=your-llm-model
```
在创建的 mcp-client 目录下执行命令 (`{access_token}` 需替换为用户自己的令牌,获取方式见详见 [用户授权流程](/app-integration-dev/wps365/server/certification-authorization/user-authorization/flow.html)、[获取用户access_token](/app-integration-dev/wps365/server/certification-authorization/get-token/get-user-access-token.html))
```bash
uv run client.py https://openapi.wps.cn/mcp/v2/kso-calendar/message {access_token}
```
运行成功如图
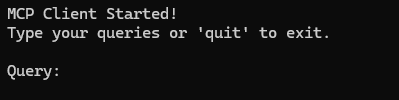
运行成功后可以开始进行对话了
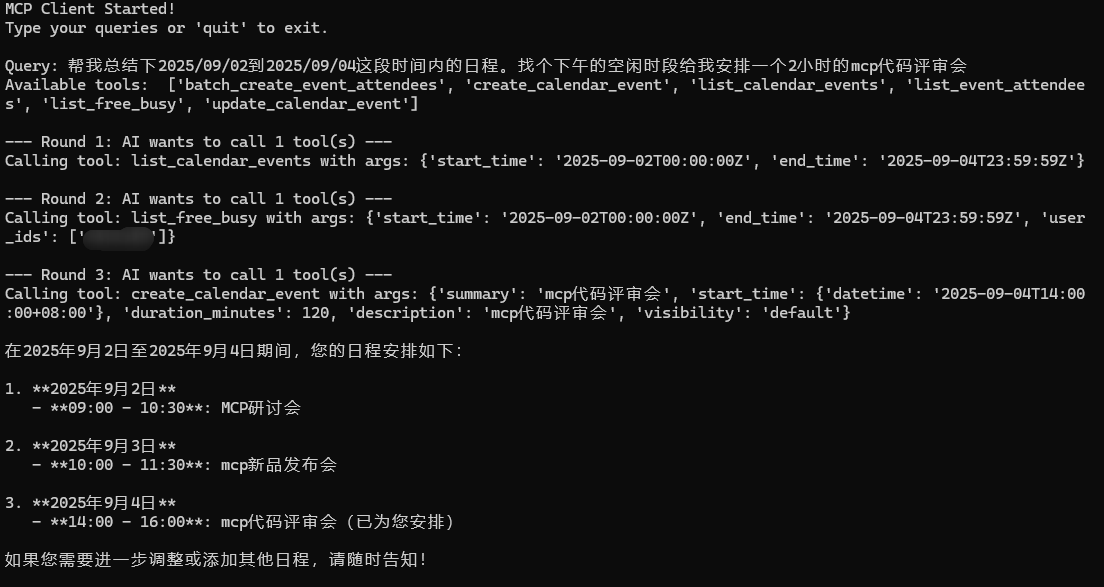
可以在协作日历中查看添加结果